In regions with cold winters, the apiary requires insulation or placement in a winter house. The frame hive, assembled using the sandwich technology, allows to ensure a comfortable stay of bee colonies outside in any frost.
Such a hive is assembled from different materials: boards, fiberboard plates, plywood with a thickness of 8-10 millimeters, polycarbonate. The choice of material is largely determined by the characteristics of the climate in a particular area. For Siberia and the Urals, boards with a thickness of at least 40 mm are suitable. Thick plywood can be used in the middle lane. The insulating material is sawdust, dry straw, foam sheets or an air gap.
The content of the article
- 1 design Features
- 2 Advantages
- 3 DIY assembly
- 3.1 About sizes
design Features
The technology of manufacturing insulated double-walled hives is nothing new. In the classic version, the front and back walls are insulated. This practice is common in the northern regions, where the inter-wall space of bee houses is filled with free-flowing insulation of natural origin – moss, wood chips, fire.
Modern beekeepers turned to the experience of builders building houses from sandwich panels – and began to collect hives entirely from double walls. Moreover, modern technologies make it possible to insulate any structure, regardless of what it is assembled from.
The main thing in the frame assembly is the observance of the wall thickness. The inside of the hive should be thinner than the outside. For example, the inside of the house is knocked out of thin boards about 15 mm thick, and outside the material is used 25-40 mm. This is done for better moisture evaporation.
The bottom can be either deaf or detachable. And the best insulation for the frame is foam or void (air).
Polyfoam is chosen for many reasons. It is a cheap insulation that is resistant to moisture, does not attract ants or rodents, is light in weight and easy to assemble. From beekeeping practice, it is known that mice, ants willingly settle in natural insulation, moths start, and even penetrate into the walls of a lizard. So, with all the environmental safety, moss, sawdust or straw can cause a lot of trouble for the beekeeper.
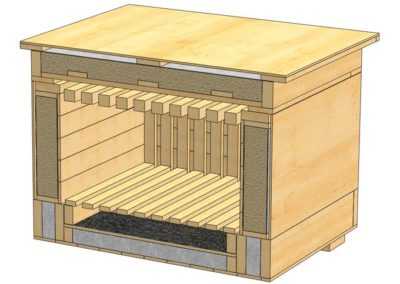
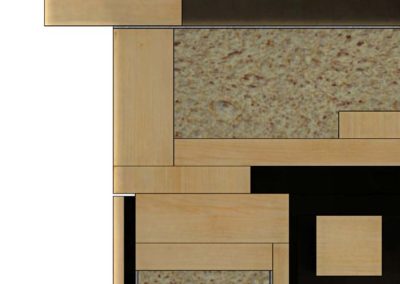
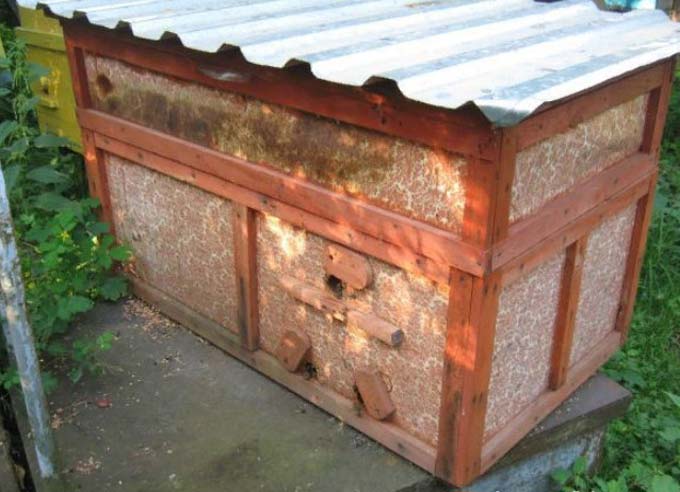
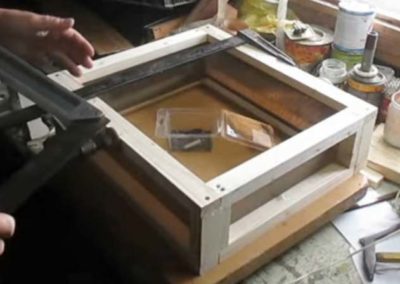
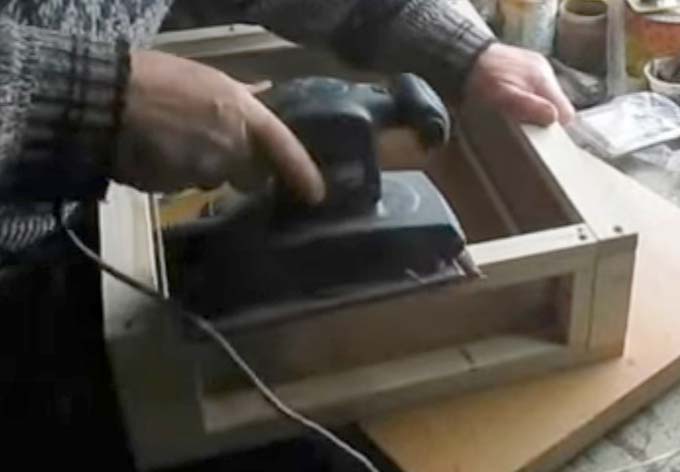
This is how a frame hive system looks like in practice, mounted on the principle of a ventilated facade using 5 cm thick foam:
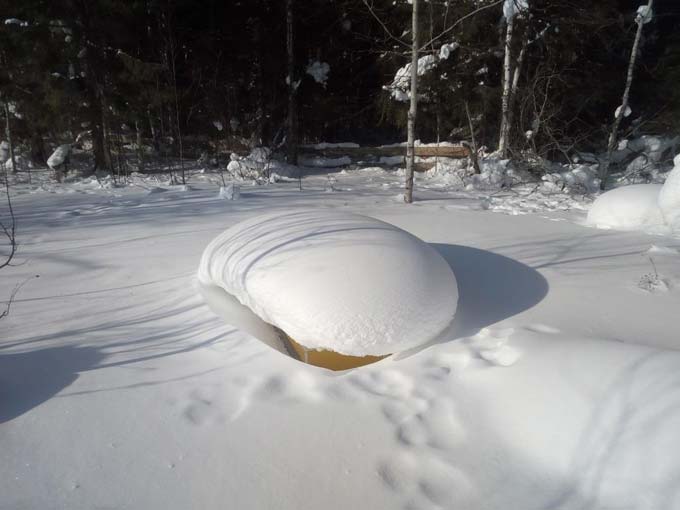
During the crash test, the hive was dropped to the weakest angle from a height of 2 meters. The tests were successful – the structure remained intact.
Advantages
Separately, I would like to highlight the advantages of frame technology. An unheated hive in a harsh climate cannot be used without an Omshanik (wintering house).
Hence the problem of getting out of hibernation arises. The hives must be removed from the premises on time. If the apiary is large and the weather is capricious in spring, the beekeeper will be guaranteed an “epic” with an exhibition for the next 2-3 weeks.
There is only one way to avoid this – by correct insulation and wintering at the point. And it is the frame technology that provides maximum thermal protection, which does not require any additional heaters in the hives. Having taken care of your pets once, you can forget about the winter-spring problems, of course, provided that the bee dwellings are properly ventilated.
Preparing for winter in frame hives will consist of feeding families, removing the layers and installing boards along the front wall to protect the entrances from being swept up by snow.
If the hives are planked from the inside, they can be cleaned and burned without problems in spring with a blowtorch or a gas canister.
There is an opinion that the frame is best done according to the principle of a ventilated facade. In this case, the walls will not be saturated with moisture. However, it is worth emphasizing that this measure does not affect the welfare of the nest in any way! If the beekeeper makes a mistake with the ventilation in the hive, the families will not come out healthy from wintering.
Whether or not to refuse the folds is up to the beekeeper himself to decide based on his own practice. When wandering, the folds allow you not to use belts and clips. And the stationary content makes it possible to abandon the folds – frame cases, like any others, are installed without gaps. But here, too, there are pitfalls – the rejection of folds deprives the dwelling of an air gap at the joints, eliminating drafts! The bees overlap the joint with propolis, which complicates the removal of the bodies.
And most importantly, in comparison with Finnish bee boxes, frame dwellings for bees win in terms of environmental safety. Despite all the advantages of the Finnish system, the foam remains foam. And for this reason, many experienced beekeepers treat him with great distrust, asking one simple question to innovators – “Would you like to live in a foam house yourself?”
Whether or not to support such a point of view is a moot point. However, the fact remains – the frame, insulated with foam, avoids direct contact of the bees with the insulation. And at the same time, the house remains cozy, dry and warm.
DIY assembly
Note! The choice of plywood or thin fiberboard as a building material will require reinsurance – in severe frosts, it is still better to bring the hives to the winter house. Severe frosts include temperatures below -15 … -20 degrees Celsius for several days.
Also, sawing a plywood sheet is more difficult than working with planks. And the folds will have to be assembled from separate parts. The case can be assembled from boards in 4-6 hours of work.
In the middle lane, the choice of material is not so critical. Craftsmen here generally manage to significantly reduce the cost of the construction – they use:
- fiberboard sheet for the inner walls, after making the hive, impregnated with wax (a building hair dryer is used);
- a sheet of polystyrene as a heater for the inter-wall space (the thickness is selected depending on winter temperatures, 50 mm provide maximum protection for the home);
- linoleum or thick leatherette for exterior walls are cheap and practical materials that do not require any special processing or maintenance.
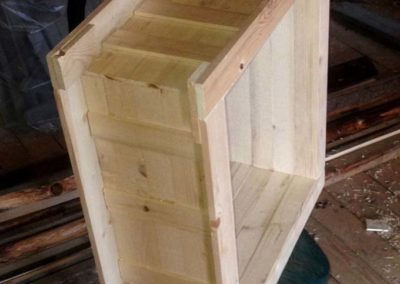
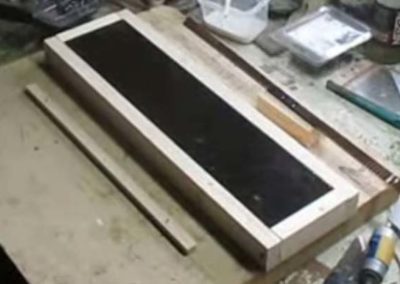
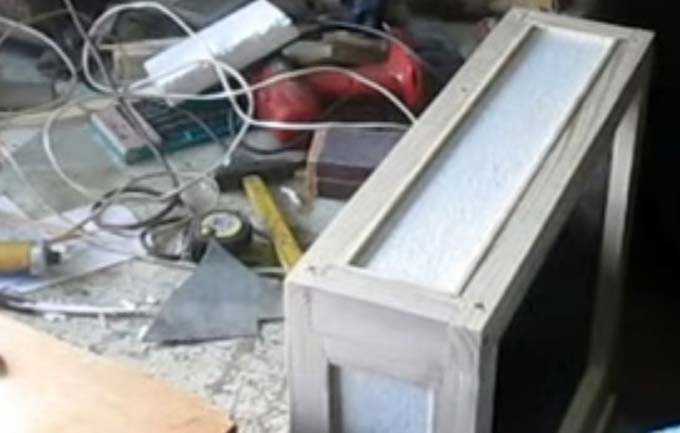
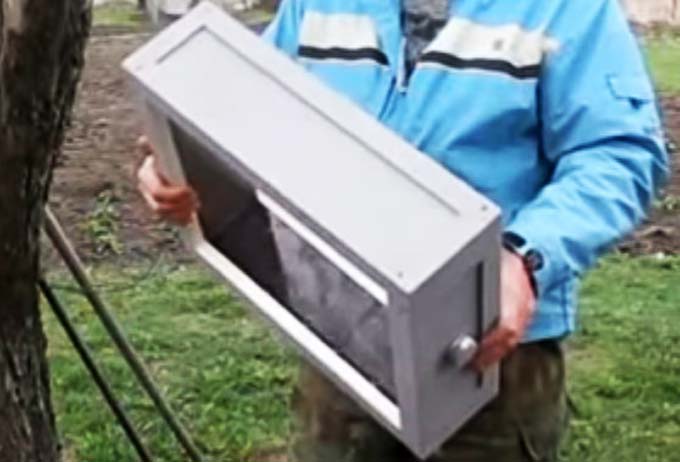
This is how the finished product looks like:
The main advantages of such a simple design are low labor costs for assembly and low cost of the product, which is important for small amateur apiaries.
About sizes
A do-it-yourself frame hive is made of any material, taking into account the size of the frames used. With the same success, you can assemble a model for Dadanovskoe, rutovsky or narrow-high frames – it all depends on the wishes of the beekeeper.
The basis of any structure of this type is a frame assembled on screws and waterproof glue, sheathed from the inside and outside with the selected material and equipped with insulation in the space between the walls.
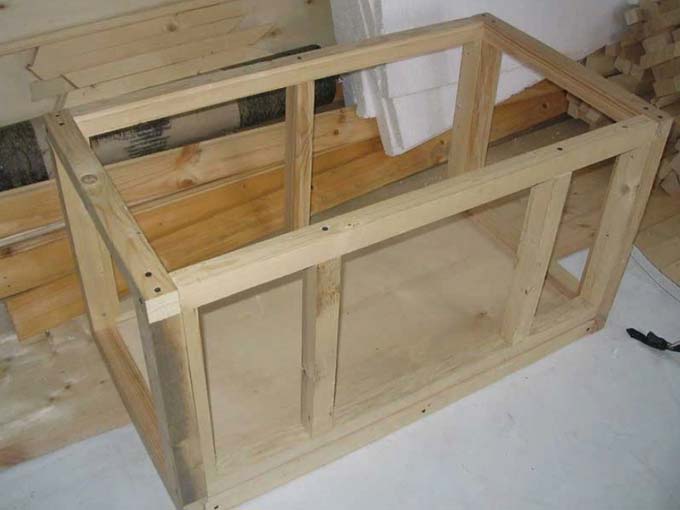
We will consider in detail the manufacturing process on a store case assembled from cellular polycarbonate with a thickness of 6 mm. The specified material can be replaced with plywood of the appropriate thickness.
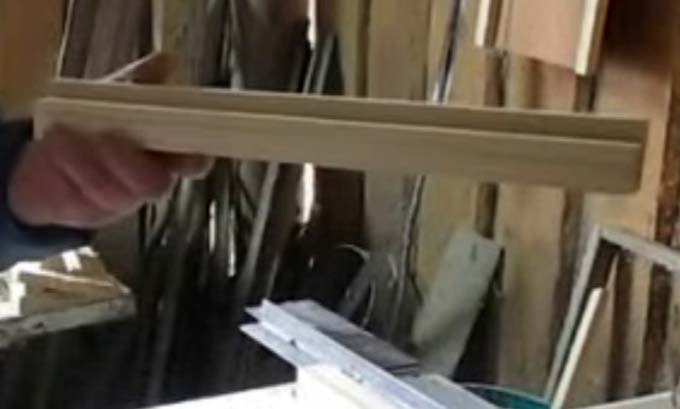
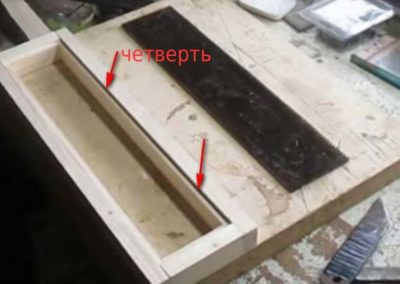
For work, you will need rails from which the frame itself is mounted, measuring 40 by 30 mm (you can use any other value). In them, quarters are selected for the frame hangers using a circular saw with a thickness of 2 mm or a milling machine. Cutting width 12, depth 17 mm. The quarter is performed in two passes. These quarters are needed only inside the hive – at the top on the front and back walls.
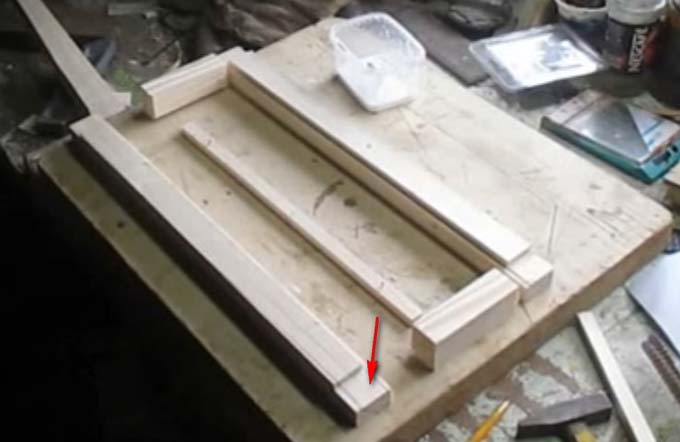
On all bars, in two passes, a quarter is selected for installing a polycarbonate insert. Sizes 9 by 6 mm. Then trimming is performed – the workpieces are cut to the required dimensions of the parts. Places for lintels are selected along their edges.
Assembly holes are drilled at the joints (on the lintels). For fastening, 3,5 mm screws are used, and the through holes for them are made with a 4 mm drill. The holes are offset from the center of the bars so that the screwed-in screws do not interfere with the assembly!
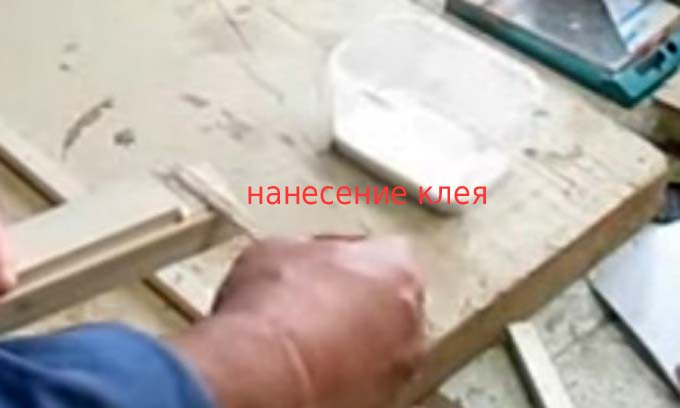
Then the surfaces to be glued are abundantly lubricated with PVA glue (PVA can not be spared, since all the excess will be squeezed out and removed with a rag).
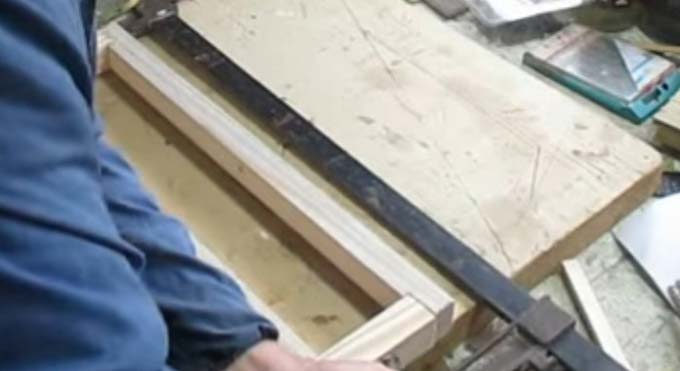
The side wall frame is assembled and secured with a clamp. The joint surfaces are leveled with a hammer.
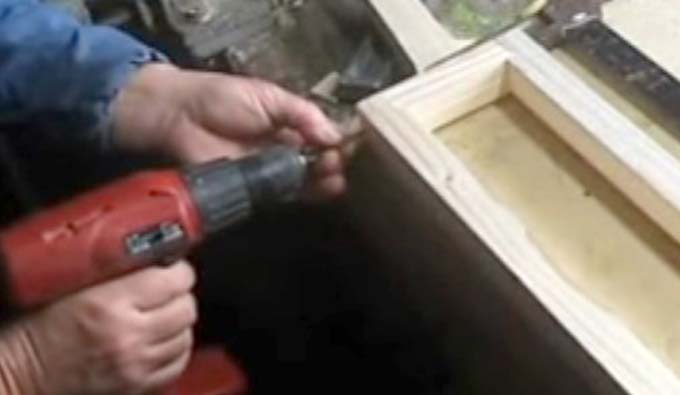
Using a screwdriver, screws are screwed in, the length corresponding to the size of the parts to be fastened.
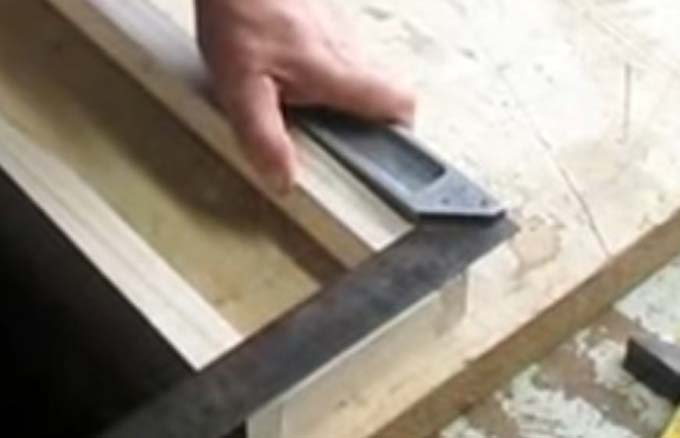
The finished part is checked using a corner for correct assembly (fastening with one screw, if inaccurate, can lead to deformation at the joints). Flaws are equalized with a small hammer.
A polycarbonate liner is inserted into the outer quarters. This material is conveniently formed – both a circular saw and special knives can be used. It is fixed in the grooves with small studs or screws 16 in length and 1,2 mm thick. Pilot holes are pre-drilled with a drill!
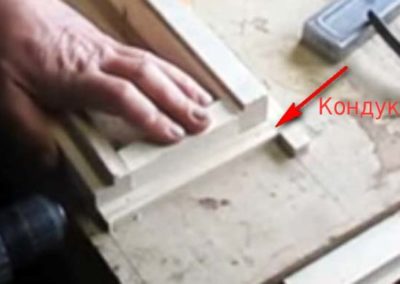
The second side wall is assembled in the same way.… And for the front and rear walls, you will need a jig in the form of a frame made of rails – it is fixed on the desktop.
Pre-drilled guide holes for joining with the sidewalls (4 mm drill). They are performed off-center to avoid overlapping screws during assembly. The joints are coated with PVA, the frame of the walls is fastened with screws. A piece of polycarbonate is installed.
Before starting the assembly, the body parts are fixed with a clamp. Angles are checked – everywhere should be 90 degrees.
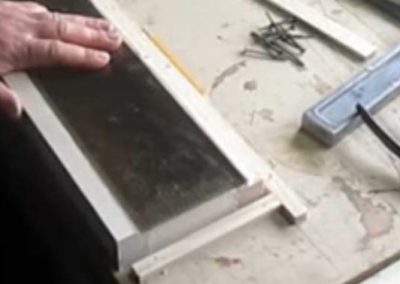
The walls are twisted with self-tapping screws 65 mm long (each wall is 40 mm thick). For fastening reliability, holes are made with a depth of 20 mm – an 8 mm drill is used (diameter according to the screw head). Then the drill is changed to 4mm and pilot holes are made. Self-tapping screws are screwed – one for each mount.
During assembly, you must watch the right angles! Flaws are adjusted with a clamp (position, clamping force). All screws on the upper edge of the case are slightly recessed into the parts. This is done for the convenience of processing with a grinding machine. Additionally, all sharp corners are processed with sandpaper.
For insulation, foam plastic is used with a thickness of 30 mm and a density of 35. The sheet is cut into inserts for insulation using a sharp knife. The resulting pieces are inserted from the outside into the grooves of the walls.
You can fix the insulation by means of glazing beads – scraps left over when sampling quarters, as well as PVA glue and carnations. The adhesive provides additional protection against atmospheric moisture. Guide holes are pre-made into which nails are inserted. Each glazing bead is lubricated with PVA and then nailed into place.
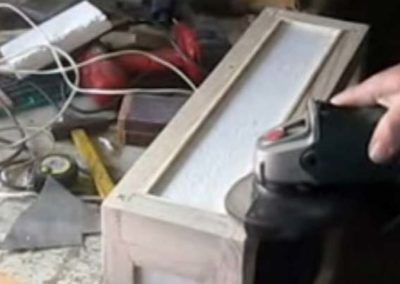
After the glue dries, the protruding sections of the glazing beads are removed flush with a grinder. The surface is leveled with a grinder and sandpaper (in the corners).
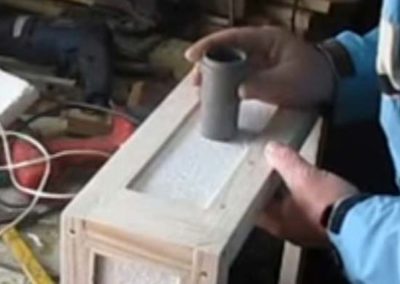
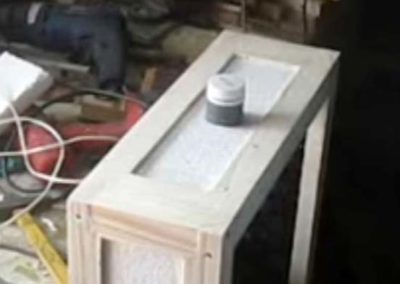
A hole is made in the center of the front wall for the notch. For the taphole itself, you can use polyvinyl chloride pipes-inserts with a diameter of 40 mm and lids from food milk bottles. With the help of the cover, the tap hole can be closed or opened. The hole is made with a bolt. The foam plug is removed with a rotating motion. Polyfoam along the edges of the hole is lubricated with PVA, on which the insert from the tube is mounted.
After the glue dries, a hole with a diameter of 25 mm is burned in the polycarbonate. If the entrance is not used constantly, the lid from the food milk bottle must be painted together with the body so that it does not shine through to the light and does not irritate the bees.
The finished body is primed and painted in a suitable color. But you can leave only one primer, as it is considered that it “breathes” well.
Read about choosing the right color here:
Choosing a paint color for a bee hive
The assembly of the case shown in the example is quite complex, but it is quite suitable for a single production of beehives or the manufacture of store extensions without folds. The construction is warm, light in weight, and has a good appearance. Instead of handles for the body on the 145th frame, protrusions on the outer walls are used, which remained after the installation of the insulation.

 honey")


 of natural bee honey")


