You can buy a ready-made hydroponic plant in the store. However, these models are designed for a certain number of plants and have standard dimensions. You can solve the problem by assembling your own installation using ordinary PVC pipes. Such designs are quite compact, easy to use, economical and do not require special knowledge to assemble.
What is hydroponics?
Translated into Greek, hydroponics literally means “work on water”, which perfectly illustrates the essence of the process. The working medium in hydroponic installations is nutrient aqueous solutions.
However, among the features of hydroponics, one can name not only the absence of the soil familiar to plant breeders.
It is possible to grow seedlings in hydroponic systems in any conditions and any time of the year.
Advantages and disadvantages
Making and assembling hydroponic equipment at home is easy. But, before collecting the necessary tool, it is worth familiarizing yourself not only with the advantages, but also the disadvantages of the water principle of growing plants. Hydroponic plants are definitely worth considering for several reasons:
- Compactness. Allows you to get large yields from small areas.
- Versatility. You can place hydroponic plants anywhere: balconies, basements, closets, etc.
- Profitability. Unlike soil crops, oddly enough, the consumption of liquid and nutrients in hydroponic plants is much lower.
- Convenience and cleanliness. You can forget about weeds, dust and other delights of earthwork.

The disadvantages of water installations are much less, but they still exist:
- Aqueous solutions should be regularly enriched with nutrients.
- The design requires constant monitoring. Failure of even one insignificant part can lead to loss of yield.
- Volatility. Almost the entire process of growing in structures without the use of a substrate is tied to power supply. Therefore, it is extremely risky to use hydroponics in areas with frequent power outages.
Another conditional disadvantage of the hydroponic method is the limitation on crops. For example, you cannot grow a crop of potatoes or carrots on an aqueous solution.
How does pipe hydroponics work?
Currently, craftsmen have developed many modifications of hydroponic systems, adapted to individual capabilities and needs. But the bulk of the designs is based on one of three basic principles of functioning:
- Ebb and flow. When choosing this method, the solution is supplied to the roots for a short time at regular intervals. During the outflow of the nutrient solution, the root system is saturated with oxygen.
- Capillary irrigation. This species has a mixed technology. The plant root system is placed in a light and very loose substrate, and the nutrient solution is continuously supplied in small quantities in the form of drip irrigation.
- Drip irrigation. The liquid continuously flows to the roots through small channels. The solution, which the plants do not have time to consume, goes down into the container through the drainage hoses.

Most often, professional growers use the classic hydroponics options: the first or third. The second option gives good results when growing small root crops.
How to make hydroponics from pipes?
DIY hydroponic plants can be of completely different modifications. It can be:
- multistage structures designed for several dozen pots;
- looped, allowing you to grow plants around the perimeter of the greenhouse or create small flower beds for 4-6 shoots;
- straight-line installations, the easiest to assemble and operate. The length of such beds depends solely on the capabilities of the room.
Depending on the goals and the chosen modification of the hydroponic installation, the complete set of parts will change. For example, when assembling a looped structure, you cannot do without tees and corners. Whereas for a linear installation, the necessary parts are limited to a straight sewer pipe of a suitable diameter and a pair of plugs.

Preparation of materials
After choosing a model, you can start searching for materials. Consider the assembly of the second and most versatile option. If desired, this type of hydroponic setup can be turned into a multi-tiered plant or simplified to a linear one by removing the corner joints. For this modification, you will need the following elements:
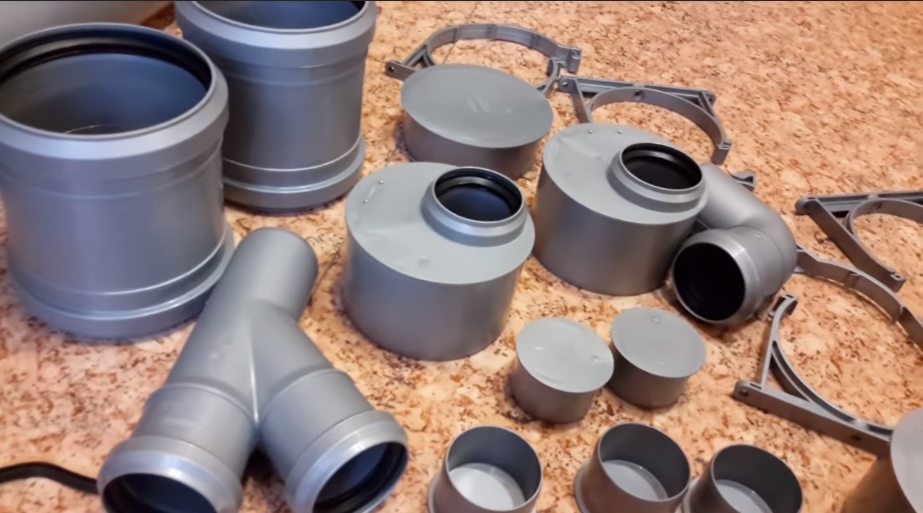
- PVC corners 900 – 4 pcs;
- PVC tees – 4 pcs;
- Plastic sewer pipes:
- Gaskets (seals);
- Plug;
- Plastic pots for indoor flowers;
- Aquarium compressor;
- Tubes for aquarium compressor;
- Air spray nozzles;
- Tees for oxygen tubes.
Seals do their job well, but in some situations you may need a sealant (silicone) to handle the joints. It is also useful for attaching the tubes. In addition, you need a drill for assembly (if you don’t have one, you can make holes in the plastic with a calcined nail), a hacksaw.
All construction details must match in size.
The optimal size is approximately 110 cm in diameter.
Assembly design
If all the necessary materials are available, the assembly of the structure will take no more than an hour. Let’s consider it in stages:
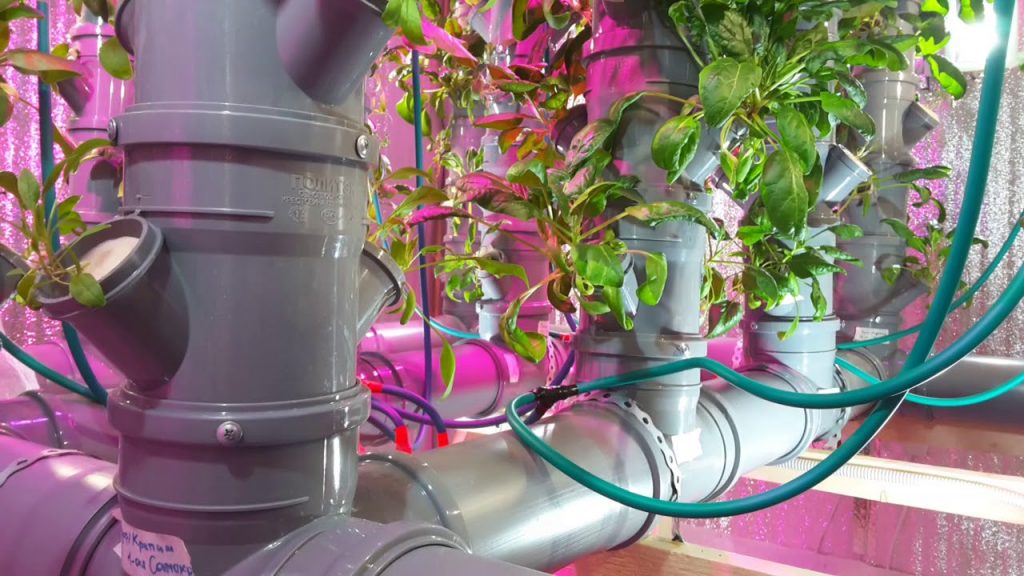
First you need to saw off the middle drain from 3 of the 4 tees. These are future seedling pot holes. In our version, there will be three of them. If it is necessary to increase the number of plants, straight segments are inserted between the tees, in which round holes of the corresponding diameter are cut.


The base of the hydroponic setup is now complete. So that the water does not stagnate, and the root system does not rot, the assembled installation must be equipped with a pump that drives the water through the pipes, saturating it with oxygen. Or design a special aeration. The second option is no less effective, and at the same time more affordable for home use. Getting started with the installation:
- We cover the remaining 4 tee with a plug, and make two holes in it: one for the air tube, the second for the float.
- We pass the transparent tube into the hole and stretch it along the entire length of the structure.
- We make a small incision near the holes for the pots in the tube and attach the tee.
- We put a small piece of tube on the tee, at the other end of which a foam rubber spray is installed.
- We fix the sprayer with silicone as close to the pots as possible.
- Put the free end of the tube on the compressor outlet.
It remains to make a float that will indicate the water level. It is made from improvised means. This requires a piece of Styrofoam and a long, thin rod. Risks are applied to the rod and brought out into the second hole of the plug.
Recommendations for growing plants
In order for the plants to grow well and not get sick in unnatural conditions for them, it is necessary to observe some subtleties:
- It is necessary to constantly add nutrients, but this should be done only in the amount acceptable for the seedlings.
- With a separate tank and pump, nutrients are added directly to the tank and then mixed with water by running the liquid through pipes. If you are using a compressor aeration design and directly add water, you need to mix the fertilizer before feeding it to the plants.
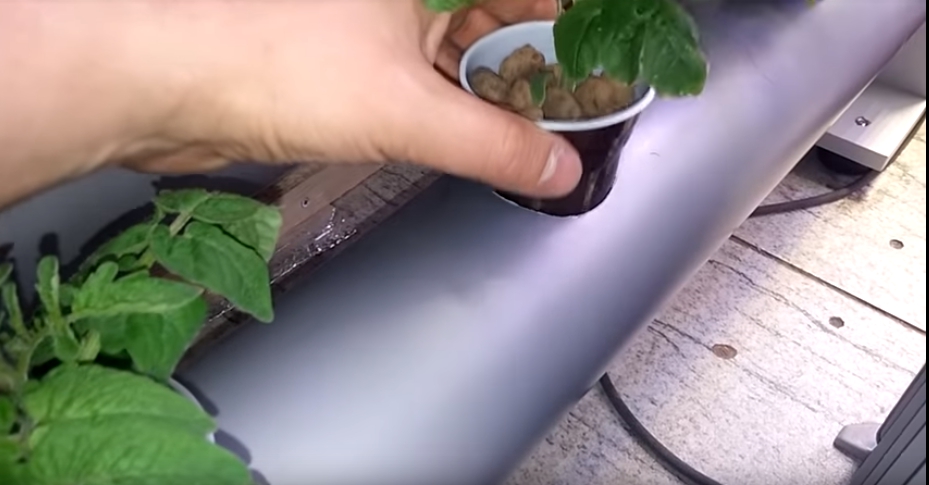
- With the running version, the seedlings are planted in an empty pot, the roots are fixed with expanded clay. In a closed installation with a forced air compressor, some light soil can be used.
- Mature bushes need a garter. This will protect the seedlings themselves from damage and prevent the hydroponic structure from tipping over.
- The fluid level should be checked every day.
- Monitor the compressor for proper operation.
- Examine the seedlings carefully. The infected plant must be removed immediately, the water must be completely replaced and, if possible, the entire structure must be rinsed.

If the plants have a weak appearance, the leaves have become faded, and the stems are very elongated, then the seedlings do not have enough light. This problem can be solved by installing additional fluorescent lamps or by making the device stand in a place with good natural light. Wide window sills or stained glass are perfect.


