When breeding poultry the most important thing is to breed young animals. And quails in this regard are very difficult to handle. Many quail, in particular, egg breeds, are not good enough hens and often throw masonry. And under other birds it is not necessary to lay their eggs, since their shells are not strong, so a separate incubator for quail remains the best solution.This device can be bought, but can be made at home.
- Distinctive features of the homemade incubator
- Making a case for homemade incubator
- Styrofoam recommendations
- Trays for laying eggs in the incubator
- Electronics for a homemade incubator
- Inverter for a homemade incubator
- Heating the incubator without the aid of electronics
- Conclusion
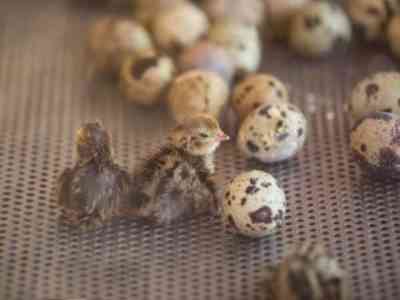
Incubator for quails
Distinctive features of a homemade incubator
There are already ready-made devices for incubating quail eggs on the market. But they have several drawbacks, because of which farmers resort to makeshift designs. Firstly, purchased devices of this type are highly expensive and their price is often very high. Secondly, they are designed for a small number of eggs, which is why they are not suitable for those who breed quail on an industrial scale. And thirdly, they are sometimes too difficult to acquire, in particular if a specific model is required.
But a home-made quail incubator should have a number of characteristics, without which it would be impossible to correctly breed chicks in it. To begin with, the necessary temperature must be constantly maintained in it. Moreover, its fluctuations cannot exceed 0.1 ° C up or down, so the incubator owner will need an accurate thermometer and a thermoregulation system purchased or made by hand, and the box itself must be sufficiently insulated. Of course, there should not be any gaps in it.
A home-made incubator for quail eggs should provide them with conditions as close as possible to those in nature. This applies not only to temperature, but also to the level of humidity. That is why it is difficult to make an incubation box so as to do without purchased devices. It will require skills in working with electronics, as well as the ability to handle a soldering iron. You also need to make a grid for the eggs in which they lie in the right position until the end of hatching. Here’s what they say about the requirements for the incubator:
“To remove quail, the incubator must maintain the necessary temperature and humidity inside for 17-20 days. The temperature is usually set at 37-37.7 ° C, and the humidity should be 50-55%. And all this should not depend on current fluctuations in the socket or, especially, blackouts. It doesn’t really matter how the farmer handles this.He can use any methods or devices that will help in this matter. “
Making a housing for a makeshift incubator
There are no strict recommendations that would define the size and shape of the incubator. The farmer always chooses the option that suits him best. In the event that you need a box for 50-100 quail eggs, a mini-incubator is made in which they all fit freely. And in industrial cultivation, when the eggs must be laid in thousands, a large cabinet is made in which they will all be placed. But in any situation, the quail incubator has the same requirements.
Still, how to make a quail incubator with your own hands? No matter what size his camera is, this device, in fact, is a wooden box with insulation. The incubator frame is made of durable wooden blocks. They are fastened together in any way possible. The main thing is that during operation they do not fall apart. Self-tapping screws are suitable as fasteners, although sometimes you can use nails or even glue. In any case, before laying eggs, it would be better to check the product for strength.
The walls of the body are usually made of plywood, although materials such as fiberboard and particleboard can also be used. It is advisable to make them whole and at the same time make walls of two layers. In the interval between them, a foam insulation is installed.In this case, it is quite possible to make it from the packaging foam, which is usually thrown away. In the walls themselves, you need to cut out the windows through which the excretion process will be controlled. They are covered with glass or plexiglass, so that there are no extra gaps.
Recommendations for working with polystyrene
For those who first make an incubator for small quails with their own hands It is often difficult to work with polystyrene. The thing is that when you try to process the foam with a hacksaw, it begins to crumble. The cut turns out to be uneven, the pieces of polystyrene stick to each other worse, and, as a result, there is no normal warming. And here one simple device can help, which is not difficult to make. All that is needed is metal scissors, pliers, a soldering iron and a can of canned food.
A plate in the shape of the letter T is cut out of the can, and its long end can be made sharp or rounded. Be sure to clean the plate from paint, paper or glue, and then it should be washed. After that, pliers are taken, and the two short ends are bent towards each other to make a ring. This ring is put on the working part of the soldering iron. With such a tip, after warming up, it will easily cut polystyrene without leaving crumbs. So it will be possible to make a normal insulation of the walls of the incubator.
Trays for laying eggs in the incubator
It is separately recommended to think over the design of the trays in which quail eggs will be laid. For laying quail eggs, a metal mesh with square cells is usually used, which is fixed inside a wooden or plastic frame. The net should be firmly fixed in the tray so as not to fall out with the eggs. For these purposes, you can use the principle of a sandwich. Two identical frames are made of wooden battens, which are then fastened together by bots. A grid is placed in the middle.
The cells on which the eggs will lie must be small enough so that the egg does not fall and break. The masonry in the incubator is located with sharp ends down, this is the optimal position for excretion. If the laying was done in a different way, then this will negatively affect the future number of birds, so the egg should be placed so that it does not turn over during the incubation process. Because of this, sometimes trays are made of different sizes so that there is no free space when bookmarking them.
Electronics for a homemade incubator
Even a craftsman who is able to make an incubator for quails with his own hands is sometimes forced to buy electronics for him. The fact is that for this device it is strictly recommended to make or purchase two devices: an inverter and a temperature regulator. Both of these devices can be made independently or purchased in finished form. But for self-manufacturing, you will need electronic skills, the ability to read the electrical circuits necessary for the device parts.
It’s worth looking at the video, on what principle the assembly of temperature control devices takes place. A separate recommendation for those who have old electronics made back in Soviet times. Spare parts from it can be very useful in the manufacture of a thermostat. The fact is that even part of the drawings shown in the video are taken from home-made circuits made back in the 80s of the last century. But these schemes are still suitable for use in makeshift incubators.
Such schemes always indicate which brand of parts are required for assembly. A novice only needs to compare the marking with the one with which the details available to him are marked. It is useless to describe this scheme here; it is better to look at it in the attached photos. In particular, it is worth paying attention to the temperature control device, made on the basis of the integrated circuit KR140UD6.The only drawback of such schemes is that they sensitively react to alternating current fluctuations in the outlet. And here another device comes in handy.
An inverter for a makeshift incubator
An inverter that would suit a makeshift incubator for a quail is quite realistic to buy. But these devices are of high cost and not always affordable for ordinary farmers. This device is needed for uninterrupted power supply of the incubator, and serves as protection against power surges and blackouts. Like an automatic temperature controller, it is very important for successful breeding of quail in an incubator. And, like a temperature control device, the inverter can be made at home.
A similar inverter is made from a regular computer uninterruptible power supply. The assembly is described in more detail in the corresponding video. It is important to make additional ventilation, since due to higher loads the UPS will be much more heated. And as a power source in case of a light outage, solar panels, a diesel generator or ordinary batteries are suitable. The choice in this matter remains with the poultryman himself. Of course, you can always buy an inverter in the finished form.
Heating the incubator without the help of electronics
Of course, it is convenient to use an automatic temperature controller and an uninterruptible power supply in the incubator. But how to make the quail incubator protected without resorting to working with electronics?Such devices are not cheap, and not every poultry breeder is capable of manufacturing them on their own. But there is a fairly convenient alternative, which is really possible to bring to life on their own. This will not require drawings of complex devices and skills that many people do not have.
If there is no way to manually adjust the temperature in the incubator, then it should be set at 37.5-38 ° C. For heating, ordinary incandescent lamps are used. To prevent air from stagnating, several round ventilation holes are made in the lid, and for uniform heating, the lamps are installed both at the very bottom and under the lid of the housing. Then the upper and lower mesh with eggs will warm evenly. Here’s how to make a device for heating from a regular water tank:
- First you need to take a finished metal canister for water or another similar container. It should be kept in case the light is turned off in constant readiness.
- When the light turns off, it is necessary to heat water on a stove or stove. It is heated until it boils, after which it is poured into a container.
- After that, a similar heater is installed under the bottom grid with eggs in the incubator. It will serve as a replacement for electric heating.
- In the event that the light is turned off for a long time, it is better to hold two similar containers and change them as needed.
Conclusion
It is quite possible to independently produce a quail incubator.But during assembly, you must follow all the basic recommendations, and then this device will quickly pay for itself.


