The cost of bee housing is an important factor in organizing or expanding an existing apiary. Wood is an expensive material, but a plywood hive can significantly save money.
There are several options for assembling it yourself, including using foam. The beekeeper will not have any restrictions on the type of product – from plywood, you can mount both a small nucleus for wintering the queen, and a Dadan, a lounger or a multi-body structure.
The content of the article
- 1 About the material
- 1.1 Advantages and disadvantages
- 2 Assembly Features
- 2.1 About sizes
- 2.2 Assembly example
- 3 About Dadans and Assembly Simplification
About the material
Plywood is as close as possible to natural materials, which are so welcomed by venerable beekeepers – they are made from wood veneer. An odd number of sheets are stacked strictly perpendicular to each other and glued.
It is a fairly durable material that is often used in industry. The range of applications is extremely wide – packaging of goods, shipbuilding, aircraft construction, furniture production, bearing bushings, building structures.
Main varieties:
- three-layer;
- five-layer;
- multilayer.
The most affordable plywood is made from softwood. Moreover, Siberian cedar is used only for decorative finishing. Birch is used in all areas, but such plywood is more expensive than coniferous. The most affordable brand is made from poplar in China. However, it is not of high quality – you should not take it to hives.
Also, the material differs in adhesive impregnation. The most weather-resistant brand is FSF. Phenol-formaldehyde glue is used in its production. For residential premises, sheets with an emission class not exceeding E1 are recommended. It can also be purchased for an apiary.
The FBA brand is glued with natural casein-based glue. It is environmentally friendly, but it does not resist moisture well. Suitable only for interior decoration of hives.
Particular attention should be paid to the location of the veneer in the sheet:
- Longitudinal placement increases the flexibility of the material. The width of the sheet will be greater than the length, for example 2 by 440 mm.
- Transverse placement increases rigidity. For such sheets, the width is less than the length, for example, 1 by 220 mm.
Advantages and disadvantages
The positive aspects of the operation of plywood hives include:
- environmental safety;
- dryness;
- light weight;
- sufficient strength thanks to the wooden frame.
A noticeable disadvantage is the small thickness of the sheet. For this reason, plywood is used mainly in frame assemblies when it comes to hives for year-round use.
For summer store extensions, portable boxes, ro-catchers, you can take a sheet with a thickness of 6 mm. All of these products are assembled without insulation – that is, they have a single-wall structure.
Assembly Features
Do-it-yourself plywood and foam hives can be assembled in several versions:
- classic sun loungers;
- double-walled Dadans;
- multi-body structures.
In all of the above options, it is the frame assembly in different combinations that is used. The most simplified version of such a homemade hive is a double-walled plywood structure, insulated with an air gap or a suitable thermal insulation material.
Read on the topic:
Frame hives – their advantages and assembly
But there are other installation methods:
- plywood inside, boards or lining for facades outside;
- plywood inside, fiberboard outside;
- inside a board or fiberboard, outside there is thick plywood.
When combining materials, plywood is placed mainly inside, as a thinner element. The insulation is most often polystyrene of different thicknesses – from 20 to 50 mm.
The plywood and foam hive is the most economical design, easy to assemble and practical to use. Loose natural materials attract rodents, moths, ants. They have to be changed practically every year. And modern heaters such as basalt slabs are expensive and more difficult to install than foam.
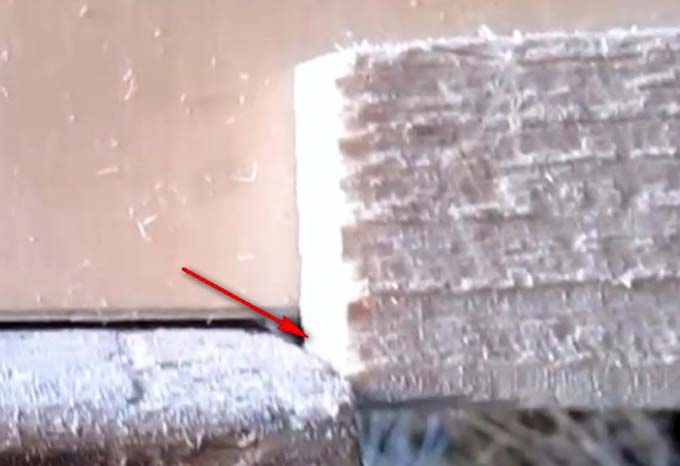
Important! The inner walls should be thinner than the outer ones to ensure proper moisture removal. Condensation must not linger inside the dwelling. For example, plywood is taken with a thickness of 4-6 mm inside and 10-18 mm outside.
About sizes
A plank bed or a Dadan’s beehive made of plywood is assembled in compliance with the standard dimensions inside the case – the frames must be in the correct position. It is for their size that any design of the hive is adjusted.
For sun loungers, this is 810 by 450 mm with a height of 355 mm to the roof liner. Dadans – housing 450 x 450, height 310 mm (accommodates 12 honeycomb frames). Multi-hull Routes – 450 x 375, height 250 mm (accommodates 10 honeycomb frames).
If desired, you can make changes to the design. The main thing is to ensure the correct installation of the frames:
- 7,5-8 mm is left between the walls and side strips of the honeycomb frames;
- 37-38 mm – distance between the centers of adjacent frames;
- 25 mm – thickness of each frame;
- 11 by 20 mm – folds for installing honeycomb frames.
Assembly example
For work you will need:
- plywood sheet 10 mm thick (1 x 200 mm);
- 25 mm board – 1,5 meters;
- electric jig saw;
- screwdriver or screwdriver;
- self-tapping wood screws – 32 and 45 mm long;
- clamps and corner for assembly;
- woodworking Machine.
DIY plywood hive – drawings:
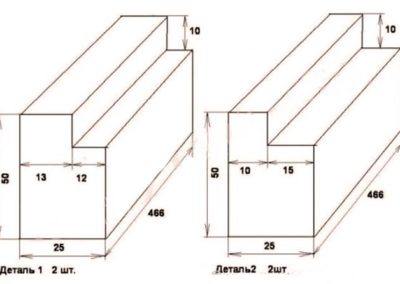
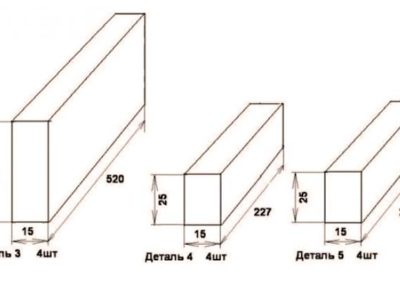
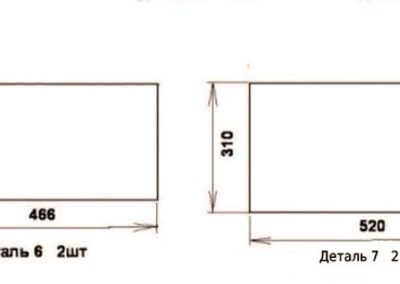
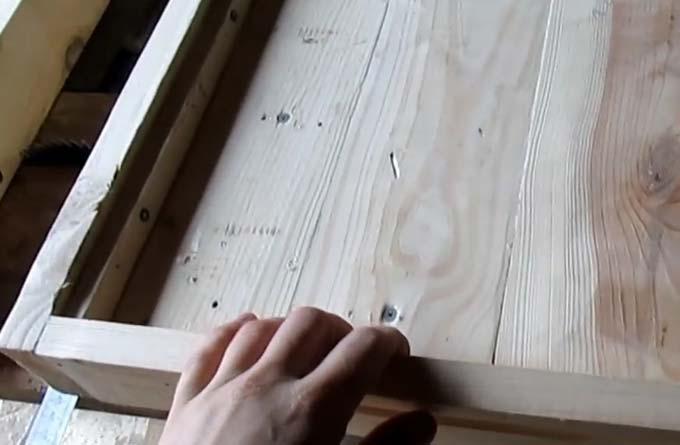
Assembly order:
- The board is sawn into the required number of lengths of 520 and 466 mm, each of which is dismantled into three parts using a household woodworking machine.
- A bar with a quarter is attached to part No. 6 (det. No. 1). The groove of the part is aligned with the plywood, the joint is fixed with self-tapping screws 32 mm long. Additionally, PVA can be used at all joints – this will provide reliable protection against atmospheric moisture.
- The second block is attached to the same plywood (det. No. 2). The groove of the part faces outward. Using a vernier caliper, a 20 mm shelf is measured for hanging the honeycomb frames. The joint is fixed with three 32 mm self-tapping screws.
- Side bars are also screwed here (det. No. 4). The assembly is carried out using clamps and a corner to eliminate deformation.
- The second side of the hive is mounted in the same way (see step 2-4).
- The front and rear walls are attached to the sidewalls with self-tapping screws 45 mm long (in the drawings, det. No. 7) – the screws are included in parts 1 and 2. In this case, all corners and planes are controlled using a corner and clamps.
- At the final stage, parts 45 and 3 are screwed to the front and rear walls with 5 mm self-tapping screws. The ends of the screws protruding from the inside are cut off with a grinder.
- The plywood protruding at the top (thin strips) is removed with an electric jigsaw. These scraps are used to strengthen the grooves when installing the insulation outside. They are drilled with a 1,5 mm drill bit and fixed with small studs. Foil can be placed on top of the foam.
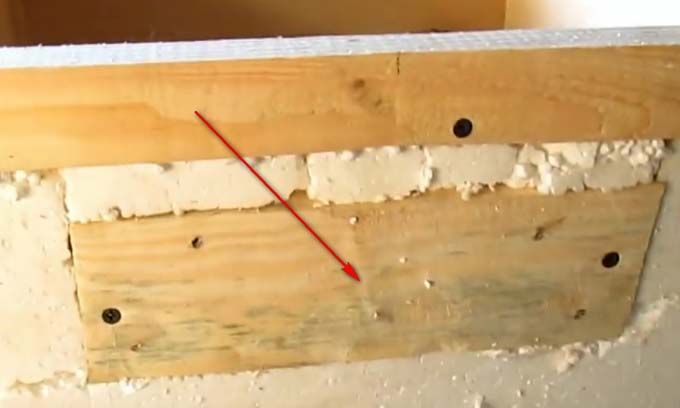
- Outside, 3 mm plywood is inserted into the grooves of the frame, and fixed with self-tapping screws. Without insulation, the hive can be used for summer keeping bees.
The cost price of one plywood case assembled according to this scheme is about 200-250 rubles.
About Dadans and Assembly Simplification
Note: The assembly can be carried out, including without any grooves – in the joint, which greatly simplifies the task.
The detachable bottom for plywood Dadanov hives is collected not only from new boards, but also from waste. For example, you can use old boxes made of 20mm planks.
To make a 40 mm bottom, such boards are knocked down crosswise – a two-layer part is obtained, all defects in which are putty on the outside before painting. Two tap holes 25 cm wide are cut into the bottom trim.
If the assembly is carried out end-to-end, the assembly starts from the inner box of the case. Then the frame bars are stuffed outside. They are installed at the top, bottom and corners.
In places for round tap holes, it is also necessary to attach wooden blocks. The holes are drilled with a downward slope of 15-20 degrees to prevent moisture from getting inside.
After the installation of the external plywood, the bars are stuffed along the bottom of the enclosures so that a protrusion of 1 cm remains at the bottom.
The dimensions of the parts for the double-hull Dadant proposed here: 450 by 310, 470 by 310, 510 by 320, 530 by 320 – everything is made in 4 pieces. Plywood 10 mm.
When installing a double-walled structure, the thickness of the insulation is always taken into account. The section of the used boards or frame bars is selected for it. Polyfoam should occupy all the space inside the wall, bottom, cover (if it is insulated) in order to exclude cold bridges.


")


