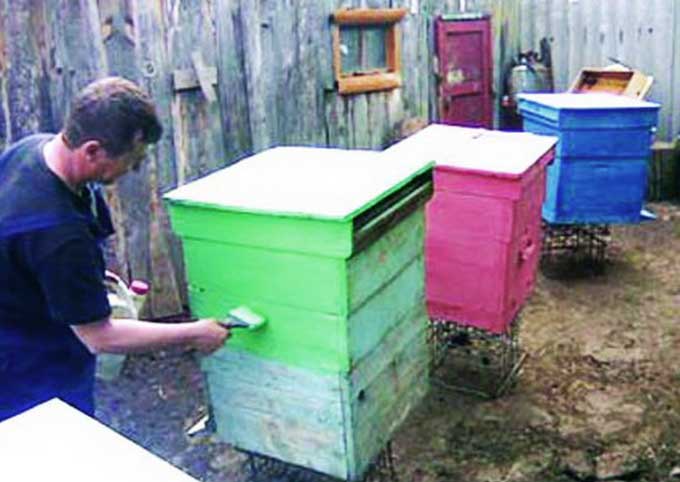
The paint creates a thin protective layer that protects the bee houses from adverse environmental influences. This fact is the main reason for painting the beehives in the apiary.
However, the approach to staining differs depending on the beekeeper’s preference. Someone is content with ordinary oil paint, others strive for maximum environmental friendliness – they use various formulations on a natural basis.
We will gladly tell you about the features of paint for beehives, its correct application, high-quality preparation of the working surface, as well as useful advice from folk craftsmen in this article.
The content of the article
- 1 Harm of thick oil formulations
- 2 Staining rules
- 3 How to remove old coating
- 4 What can be used for putty
- 5 DIY paint
- 6 Traditional staining
- 6.1 Acrylic – advantages and method of application
Harm of thick oil formulations
Oil paint that is thick in consistency should be treated with extreme caution. The teachers of the Kherson Agricultural Institute directly indicate that such a coloring composition:
- with frequent use, it prevents the natural evaporation of moisture;
- reduces the period of use of bee houses;
- worsens the wintering of honey bees (this is especially noticeable in damp and rather warm winters).
Therefore, for painting work, it is necessary to use oil-based compositions on an organic basis. And they are applied in the spring with a neat thin layer, the integrity of which is partially violated by the fall – as a result, the moisture permeability of the walls increases (the hives “breathe”).
Such repair of bee houses is carried out every 5-6 years. This time interval is quite enough to preserve the integrity of the structure and a comfortable stay of bees in the nest.
Staining rules
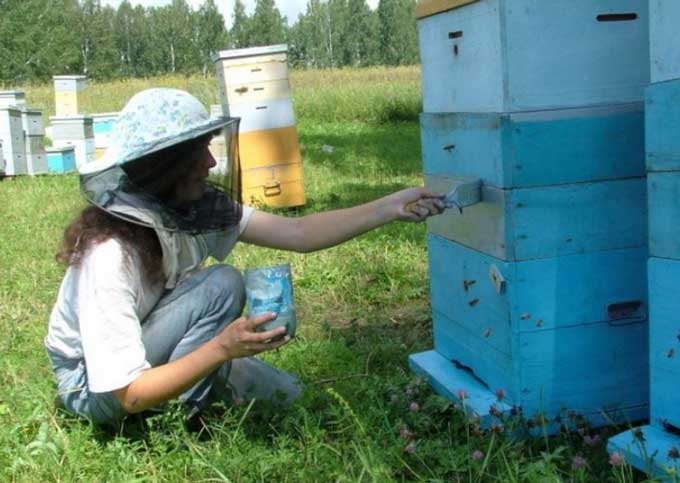
In order for the coloring layer to be of high quality, and the hives to have a presentable appearance, one must not forget about the requirements for this type of work.
Compliance with the technology implies the application of the coloring composition in warm and dry weather. Warm days and nights are observed from mid-spring to August-September, depending on the region. The main thing is that there are no sharp temperature fluctuations during the day.
Rains, frosts, spring thaw – those weather conditions in which the application of any paint is unacceptable.
All horizontal surfaces, in our case hive covers, should have a slight slope. This will allow the water to drain freely to the ground without damaging the paint.
The surface to be painted must be absolutely dry. If dew or fog gets on fresh paint, it will become cloudy and lose its beautiful appearance.
The presence of abundant dust and various insects in the air is also undesirable. For this reason, beekeepers prefer to paint the hives in early spring, as soon as fine days come. During this period, there are fewer insects in the air than in any other warm month.
It is also important to take into account the vital activity of the bee colonies themselves. If you apply the coloring composition in the evening after the end of the active summer, insects will not stick to the treated surface. And by morning, the hives are almost dry.
If possible, it is better to paint bee houses in a specially prepared room, where a constant temperature of at least +10 degrees is maintained. It should be clean and dry here. Do not remove the old paint layer, sand or sweep the floor. In the spring, the hives should warm up – stand in the same room for a while until the condensation disappears.
When working with flammable compounds based on alcohol or nitrocellulose, the room must be thoroughly ventilated! It is forbidden to smoke, use an open fire, heat the stove, use electric heaters with an open coil.
The fumes from most paints are harmful to human health. Therefore, during work, it is forbidden to eat, drink water, work without gloves and a respirator.
The purchased paint is stored at an ambient temperature of +5 to +25 degrees. Frost and heat reduce the quality of the dye composition. After opening the can, the film is removed from it, and the contents are thoroughly mixed with the addition of a diluent recommended by the manufacturer. It is desirable to filter the ready-to-use composition through a fine-mesh brass strainer or a nylon stocking folded in half.
How to remove old coating
Often, hives need preliminary cleaning of old paintwork.
This can be done in two ways:
1.Burn the bee houses with a blowtorch until the old paint is completely softened. After this procedure, the layer damaged from time to time can be easily scraped off with a wide spatula. This method is understandably unsuitable for hives made of various types of plastic.
If it is necessary to protect any structural parts from fire, for example, glass windows, they are covered with a slab of asbestos or pressed wood fiber during firing.
After blowtorch treatment and cleaning with a spatula, sand the surface with a paper-based sandpaper, remove all dust with a soft brush and apply a layer of primer.
2.Apply a mechanical method – grinding, scraping with a knife or a glass shard… This method is ideal for cleaning small areas, provided that the old coating is not removed from the rest of the bee house.
What can be used for putty
The slit hive is one of the main reasons for poor honey flow and the spread of bee infections. The old house is distinguished by a dilapidated, often leaking roof, and a cracked bottom.
Here are some inexpensive and practical homemade putty putties.
For homemade “adobe” you will need water, clay and petroleum bitumen No. 3 – everything is taken in equal proportions. The clay is stirred in water and heated with continuous stirring. In a separate metal dish, bitumen is heated to 70-90 degrees. Then all the components are mixed. All cracks and irregularities are smeared with the resulting putty.
If you need to fix the lid, a piece of burlap is taken, coated with putty on both sides and applied in the form of a plaster to the entire surface of the lid or a gap. Within 3-5 hours, a very durable coating is formed in these places, which does not allow rainwater to pass through.
Another type of putty is prepared from a kilogram of grade 4 or 5 bitumenmelted in a bucket. After removing from the fire, 200 grams of kerosene is poured into this mass. Then the bucket is returned to the fire and in small portions sand sifted through a fine sieve is poured into bitumen (up to 4 kilograms). The finished putty has a uniform consistency. It is applied only hot. If necessary, the mixture can be reheated until softened. The putty lasts an average of 5-6 years.
From PVA glue, you can prepare a waterproof fast-acting putty… For this, alabaster or dry putty powder is added to the glue. After mixing, a fast-setting paste is obtained, which is immediately applied with a spatula moistened with water on all areas requiring repair. From above, the seams are powdered with alabaster or putty powder. After 15 minutes, the putty places will be ready for processing with sandpaper and drying oil.
DIY paint
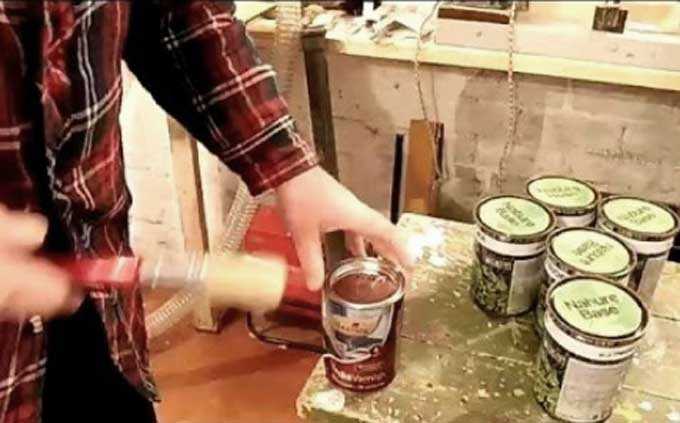
It is quite possible to paint wood hives with compositions of our own production. Here are some recipes.
1.For homemade mineral paint, take:
- one part of brick dust sifted through a sieve;
- one part quicklime;
- 1,5 parts of wood ash;
- milk.
All components are poured with skim milk – you should get a mixture that resembles cream. The paint is infused for 5-6 hours. Then, if necessary, it is diluted with milk.
The composition is applied to the hives three times at intervals of a day. The paint lasts up to 10 years!
2. The recipe for a non-oil coloring composition came to us from the regions of the Altai mountains. It prepares like this:
- slaked lime and curdled milk return (cottage cheese) is taken;
- the components are thoroughly mixed (in order for the composition to be liquid, it is necessary to add more cottage cheese);
- aniline water-based paints of a suitable shade can be added to the finished mixture, if desired.
3. Another variation of this recipe involves the use of fermented cow’s milk and quicklime:
- Prepared milk is used for extinguishing. If the composition is thick, it is diluted with the same milk. The color of the mixture is imparted with aniline water-based paints.
- The paint is applied to the prepared surfaces in two steps – first, the hives are covered with a liquid composition, dried, and then painted with a thicker solution.
The composition makes the bee houses fire resistant. In addition, it does not lose color for a long time, it is especially durable – it lasts up to 5-6 years.
4.Using a mixture of sand and drying oil is an excellent replacement for oil paint… For this, the sand is sieved through a fine sieve. After that, each hive is covered with an abundant layer of drying oil and sprinkled with sand. After complete drying, the procedure is repeated. To give the houses a different color, you need dry paint (powder).
Beekeepers note that for the greater strength of such a coating, it is better not to plan the boards of the hive from the outside.
The oil-sand coating has the longest service life. According to A.P. Medvedev is a beekeeper from the Svobodinsky district of the Kursk region, his homemade paint has served for over 30 years! At the same time, the bee houses did not dry out and did not begin to rot, and the oil-sand layer on their surface did not lose its integrity.
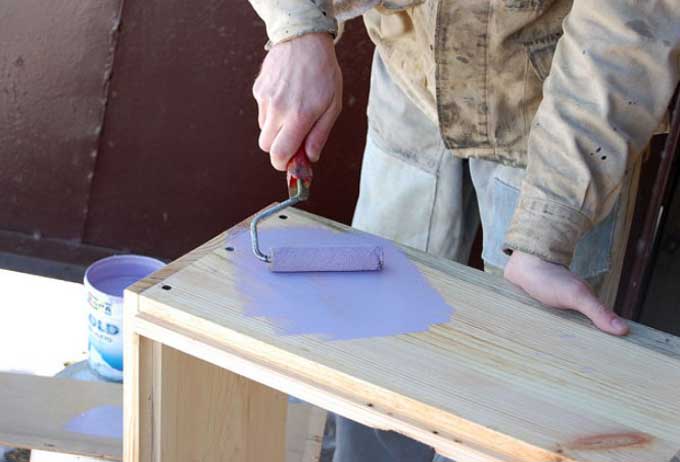
Traditional staining
Often, beekeepers use oil paints diluted with varnish or drying oil to treat hives outside. This is a rather expensive option for protecting bee houses from bad weather and time. In addition, such a coloring composition has a lot of disadvantages in operation.
A more affordable and environmentally friendly option is liquid glass, which is applied to all surfaces in three layers. After each application of a layer of glass, the hives are dried for 15-20 minutes! It is noteworthy that this material is safe for bees – it can even cover dividing grids with it. Then the bees will not gnaw on the tree.
You can also paint bee hives with other paints. Let’s consider the most popular ones:
Aluminum powder, popularly known as silver, will help protect bee nests from the adverse effects of nearby power lines. When applied to the cover of the hives, it creates a protective screen that reflects electromagnetic radiation, and at the same time prevents the houses from heating up in the summer heat. When applying silver on the walls, it is necessary to add paint (20-50 grams per package) to create a color background so that the bees can clearly distinguish their hive.
Water emulsion paint ideal for application to polystyrene foam structures. After all, reliable protection from direct sunlight is vital for this type of plastic. In addition, painted bee houses are less dirty and have a beautiful appearance.
Acrylic – advantages and method of application
Acrylic paint (for example, Triora) is the most modern and at the same time the most expensive way to keep bee houses safe and sound. Acrylic has many advantages that are pleasant for the beekeeper:
- it is a “breathable” paint that freely passes moisture and air through itself;
- the material is versatile – it can be applied both to classic wood and ultra-fashionable polystyrene;
- it does not fade in the sun for 10-15 years;
- this coloring composition is almost odorless (made on a water basis);
- easy to apply to surfaces and dries quickly (about an hour).
Acrylic grades designed for facade work are suitable for painting bee houses. It should also be borne in mind that the wooden surface should not be painted with something else before.
Work order:
- Conifers are pretreated with a solution of soda ash, heated to 50-60 degrees, or with turpentine. After removal of the resin (de-resinification), the hive is rinsed with water using a natural bristle brush and then dried.
- Then a primer is applied, selected in accordance with the material of the hives. For timber structures, you can use Triora primer designed to work with this material. The primer dries within XNUMX hours!
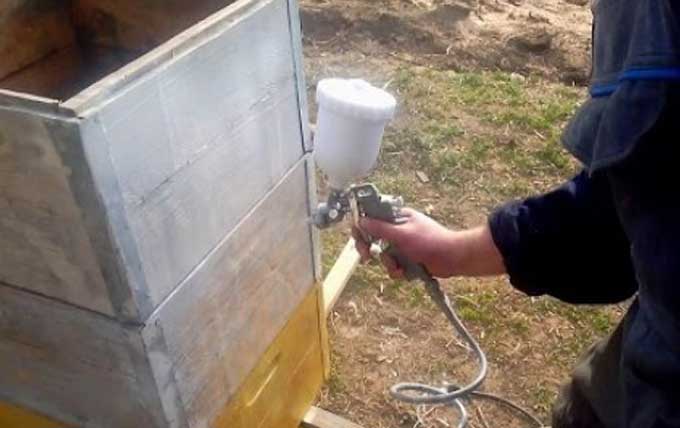
- Acrylic is applied with a brush or spray gun. After staining, the structure of the tree will be visible – the hives look quite impressive.
Here is such a wide variety of factory and homemade paints you can use for your hives. Which one to choose is up to you. We wish you successful painting!
And we will talk about choosing a suitable color for bee houses in the next article: Choosing a paint color for a bee hive.


")


 as a melliferous plant")

")


")


