The question of how to find a queen in a hive is a must for both experienced and novice beekeepers. Experienced ones need this skill to optimize time spent when working with a large number of families, and beginners – in order not to keep the hive open for a long time and not overcool the brood.
The content of the article
- 1 Search target
- 2 How to find quickly
- 3 Attracting an assistant and additional search
- 4 Using labels
Search target
Before describing the secrets of finding the uterus quickly, it is necessary to determine why we are going to do it?
If a novice beekeeper just needs to establish its presence, for example, after gnawing a queen cell, it is not at all necessary to sort out the entire nest, violating the temperature regime in the family.
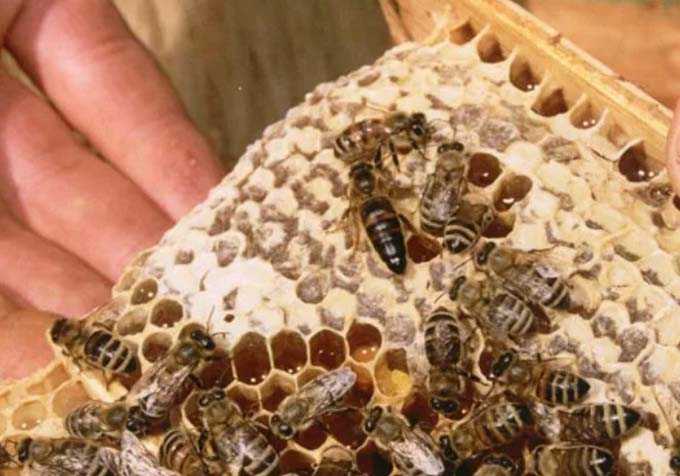
It is necessary to determine whether there is a queen or not by her work, that is, by one-day sowing or non-printing brood.
If there is seeding and it is solid, evenly distributed over all free cells, and the uterus does not sow 2-3 testicles in one cell, then it is healthy, highly productive, is in its place and does its job.
There is no need to distract the bee family from work, just to see the queen visually!
It is only necessary to purposefully search for it to carry out the necessary manipulations. For example:
- for tagging;
- transplants into layering;
- removal from the family and change;
- carrying out selection or breeding work.
How to find quickly
Of course, queens of various breeds and ages have their own behavioral characteristics! Therefore, experienced beekeepers have their own quick search secrets.
At the same time, one can single out the basic principles that are mandatory for everyone:
1) First of all, if possible, the search is best done during the daytime summer, when the bulk of the flight bee is busy working outside the hive.
2) You need to stand near the hive from the sunny side, since, looking at the frame in the sun’s rays, it is much easier to detect both a one-day sowing (which will be very useful in the future) and the uterus itself.
3) After opening the hive, you do not need to abuse the smoke, so that the bees do not start “hiding” their queen! If the family reacts overly aggressively to the intrusion, you can gently raise along the top bars of the frames.
4) If the nest is fully extended to the walls, the outermost feed frames are carefully removed and placed in a portable box to allow enough space for rearranging the brood frames in the nest.
5) Feeding frames also need to be briefly inspected – in rare cases, the queen can be there, for example, if all the cells in the nest are occupied with honey, bee bread or brood, she is looking for any free combs for seeding.
All inspected frames must be kept strictly above the hive so that the family does not lose its queen if she accidentally falls into the grass or on the ground!
6) All nesting frames are subsequently reviewed in a row. To do this, they are raised to eye level, and in the sunlight (the sun is behind!) They are examined in a zigzag manner from the top bar to the bottom bar.
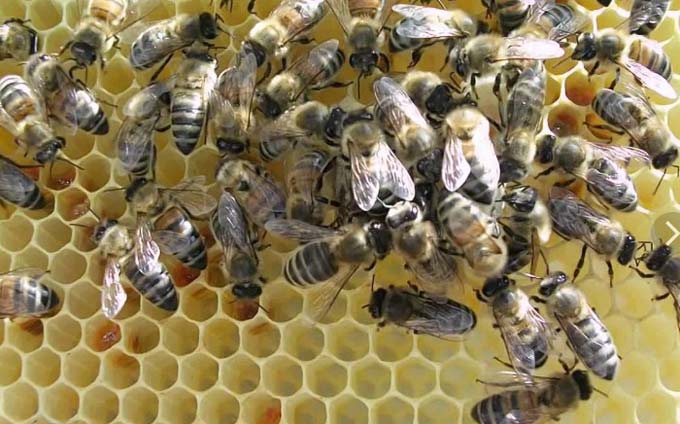
7) Particular attention is paid to the accumulation of bees in several “floors”. The retinue often hides their queen in this way. You need to carefully blow on such clusters, the bees from this will scatter on the sides – the queen will become clearly visible, if it is there.
8) After examining one frame, it is rearranged to the other wall of the hive and taken for the next.
Important! Particular attention is paid to combs with one day old brood and “polished” honeycomb cells. In most cases, the queen is on this frame!
Attracting an assistant and additional search
It is easier to find the uterus in the hive together with an assistant.
When removing the honeycomb frame from the nest, the assistant immediately examines the bottom, walls of the hive and the next frame for the queen’s “escape” from the light. And then he examines the extracted honeycomb from the second side, since the uterus can pass from one side to the other through the openings at the bottom or on the sides due to the foundation not stretched out here.
If all the frames have been examined, but there is no result, we examine the bees on the walls, the bottom of the hive and the arrival board – the queen may be there as well. After that, we repeat the inspection in the reverse order, re-forming the nest.
Using labels
So that such problems do not arise constantly, queens are best tagged. This greatly reduces the search time, and the color of the tag allows you to determine the age of the female and take care of her replacement in advance.
There are different ways of tagging:
- marker;
- paint;
- varnish;
- stickers.
They all have their pros and cons!
Marking with a marker and paint is easier, but they wear off quickly, and the smell of varnish can cause aggression by the bees – they can even kill their queen.
Sticking the label can damage the uterus. Again, the chemical smell of fresh glue can irritate the bees.
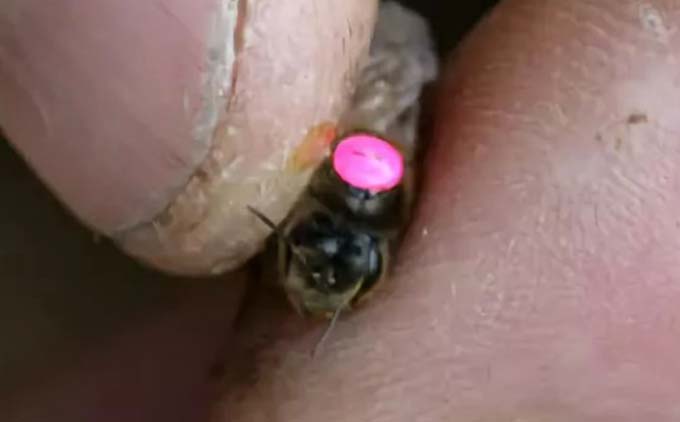
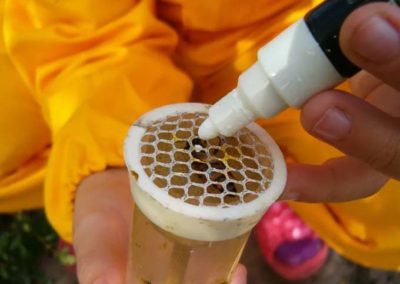
Any mark is applied like this:
- the uterus is neatly fixed with your fingers, while you cannot touch its abdomen;
- marking is carried out in the chosen way;
- then you need to place it in the cage, waiting for the paint or glue to dry.
After returning to the family, it is better to observe the behavior of the bees for a while and make sure that they calmly accept the queen back.
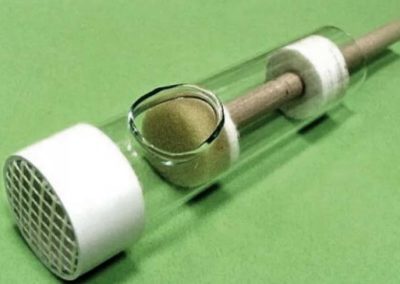
Alternatively, you can use a special tagging tube.
For the convenience of timely replacement of queens in families (they are highly productive only for the first two years), beekeeping has adopted a standard color system for marking, designed for 5 years.
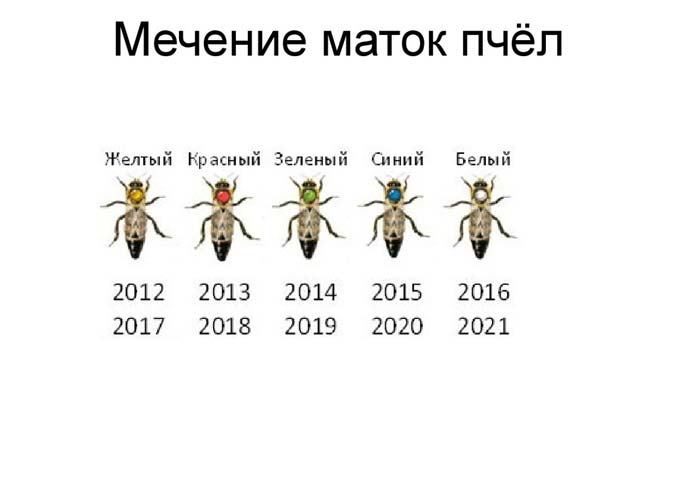
You can use it, or you can come up with your own system for quickly finding queens and accurately determining their age.

 of candied honey")


")


