Every day more and more more popular is the incubation of goose eggs at home. This is a rather specific stage on the way to increasing individuals in the chicken coop, in contrast to the artificial withdrawal of other birds, which requires tremendous efforts from the farmer. In order to carry out this procedure correctly, you must strictly follow many recommendations.The following characteristics deserve close attention: temperature for hatching goslings, the time spent by eggs in an automatic machine, etc.
- What is hidden under the term“ automatic incubation ”
- How to prepare eggs for incubation
- Features laying eggs in the incubator
- Temperature
- Typical problems for beginners
Incubation of goose eggs in machine interface conditions
can discuss many issues before the beginning and until the end of such a complex process. Let’s put the whole process on the shelves so that you can realize your dream, where the result will be the hatching of healthy and viable goslings.
What is hidden under the term “automatic incubation”
Incubation – the process of the appearance of a brood in animals laying eggs, proceeding only under correctly selected conditions (temperature and climatic conditions). Artificial incubation allows you to get as close as possible to the conditions that the laying hen creates for future offspring when it hatches them on its own.That is why, for the birth of chicks, devices are used that can maintain a certain temperature and humidity mode.
An automatic device is a mechanical scoop that can ensure the safety of goslings throughout the incubation period. At home, keeping the incubator is not as difficult as it might seem at first glance, you just need to process the grilles, the exposed parts of the device and the goose eggs themselves before laying.
The incubator will take care of the eggs from the time of laying down to hatching chicks. Such machines are able to independently set the required temperature level depending on the period of incubation of geese, as well as humidity, and control the light regime, which significantly saves farmers time and effort in this matter.
At home, specially created machines ensure trouble-free operation . For example, Nest, Cinderella, Toulouse, the domestic version of Blitz, as well as Janoel. The main thing is that before using them, be sure to check the device for operability, ensure uninterrupted power, cool it according to plan, and control the correct rolling of eggs.
How to prepare eggs for incubation
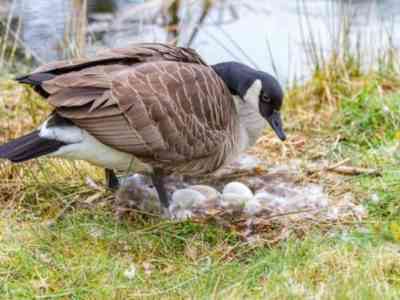
At that moment when you notice the laying of eggs, you need to start quickly pulling them out of the nests (ideal option – as long as they are warm). Remember: it is strictly forbidden to cool materials.
If you couldn’t do this on your own or decided to start raising birds by acquiring eggs, then only contact your friends to be sure that you follow the key rule for their collection.
As you understand, the temperature is The output of goslings plays an important role. But this is not the only factor affecting the state of future offspring. These include:
- The content of feed during the laying period, as well as the diet of the individual selected for breeding.
- The desired ratio of male and female individuals on the farm.
- Frequency of walking birds.
- Maintaining the microclimate in the habitat (chicken coop) at the required level.
- Do not forget that the natural environment affects the fertility of geese. For example, if poultry are released into a polluted pond, then you can not count on an increase in the number of residents of the house, because infected algae and mollusks will necessarily have a negative effect on the brood hen’s body. The goose will suffer – the brood will also have problems.
- Lack of damage on the shell.
- When rolling the egg in your hands, you can’t notice the clot hidden under the shell.
Important: only from properly prepared eggs can you grow healthy goslings, therefore, make a full breeding.
For the process of hatchery geese hatchery, you must carefully collect the eggs, as this is directly related to the future result, namely, the health of the brood. You will have to carefully consider the size, weight, type of shell, as well as the shape of the eggs. If at least one of these parameters does not fit the standards, then work with such eggs is not recommended, because you will not get good offspring.
For reference: the standard weight of an egg of small geese is from 140 to 160 g, and large – from 170 to 200 g (chicken derivatives less).
The shelf life for eggs selected for the incubator should not exceed 10 days from the moment the goose (hen) laid them, but it is better to choose weekly materials. It should also be noted that the temperature in the room with eggs will have to be kept at 8-15 ° C.
In the home mode of incubation of goose eggs, in no case should you wash them in the usual way before placing them in engine compartment. Experts say that it is possible to remove plaque from eggs with a weak solution of manganese or hydrogen peroxide, and they can also be disinfected under a special UV lamp.
To disinfect potassium permanganate, you will have to place each egg in a weak solution and do not hold more than 5 minutes, then rinse gently in warm water and allow to dry.
The important point is that the prepared composition should be 5-7 ° C warmer than the egg itself.Before you start washing the eggs, it is advisable to watch special videos that detail all the features of this procedure.
How and how much you can store the selected material
Egg storage time is an equally important incubation step, After all, the output factor depends on how long the materials will lie. The thing is that if certain conditions are not met, the contents of the egg will begin to deform.
What is the optimal storage duration? The answer to this question can be given by farmers who practice egg farming in an incubator. The best option would be a shelf life not exceeding 5-7 days. In this case, the temperature regime should be in the range of 8-15 ° C.
Features of laying eggs in an incubator
The scheme by which goose eggs are placed in an incubator looks as follows way: all prepared materials must be carefully and carefully placed in a horizontal position in a special tray (it is better to refuse foam products). This applies to small products. What to do with large eggs? Everything is quite simple: they will have to be laid vertically.
If you plan to turn them over, then mark each egg on both sides in advance with a pencil (only with different icons), and also indicate the approximate date of hatching on them. Such an approach will allow for a timely coup, which will ensure uniform heating of the material and predict in advance the time of hatching of the offspring.
Important: you will have to turn over the piece goods in the incubator several times a day (the quantity depends on the development stage).
Temperature mode
The most important thing when hatching goslings in the incubator is the correct humidity and temperature in the unit on different days (can be seen in tables 1 and 2).
To better understand what is better and when, you can see the graph in the tables:
Table 1: temperature fluctuations in the goose incubator from the moment of laying to hatching
Incubation period incubation | Incubator temperature |
| Before laying | 38.5-39 ° C |
| First hours | 38 ° C |
| Third day | 37.7-37.8 ° C |
| Fifth day | 37.7-37.8 ° C |
| Sixth day | 37.6 ° C |
| Seventh – ninth day | 37.6 ° C |
| From the tenth day | 37.4-37.5 ° C |
| Thirteenth day | 37.4-37.5 ° C |
| Twentieth day | 37.4-37.5 ° C |
| Twenty-fourth day | 37.4-37.5 ° C |
| Twenty-eighth day | 37-37.4 ° C |
Table 2: indicator fluctuation humidity for the entire period of artificial hatching goslings
| Incubation period | Humidity in the incubator |
| 1 -3 days | 60-65% |
| 3-24 days | 70% |
| 24-28 days | 75% |
You can lay the first eggs only in a pre-warmed incubator (38.5 -39 ° C), at which time All ventilation openings are closed to prevent ventilation.All this must be done in order to ensure for the eggs the vital temperature regime of 37.8 ° C (should be in the first few hours). At the moment of evaporation of the incubator, goose eggs should not be there. After that, you need to raise the temperature level to 38 ° C, and achieve humidity in the region of 60-65%.
This mode in goose incubators needs to be observed only until the third day, then you need to slightly change the temperature to 37.7-37 , 8 ° C, and reduce the humidity level to 29-30%. From this point on, once every day you will have to lower the thermometer to 32-34 ° C.
Next, an instruction will be presented, at which the output of goslings will be maximized. So, the incubation of geese eggs is as follows:
- From the 5th day of incubation, you need to perform special cooling from time to time, namely spraying the material with a weak solution of manganese. You will also need to help rotate the eggs every 3 hours if your machine doesn’t do this on its own. The process of turning over is a vital point at which the incubation of geese at home becomes productive, as it allows the embryo to develop correctly and evenly, and also helps to improve nutrition and gas exchange, which is especially important at the time of the development of the circulatory system. Important: the brood hen rotates eggs about 50 times a day, so the farmer needs to touch the material about the same time to get healthy offspring.If you think that this process can be neglected, then you will not be able to get full goose offspring in the future.
- Throughout the sixth day, the temperature should be maintained at 37.6 ° C all the time and often rotate the eggs.
- From the seventh day to the ninth, you can already begin observing the embryo through a special device – an ovoscope (idoscope). It allows you to see if the eggs that are in the machine have a germ or not. At the same time, it is important to maintain the characteristics of vital conditions established a little earlier. Important: if the egg is empty, without an embryo or with blood rings, then it should be discarded.
- On the 10th incubation day, 2 daily irrigations will need to be performed again. The temperature should be maintained at the level of 37.4-37.5 ° С, as well as to provide increased air exchange in the incubator.
- On the 13th incubation day, ovoscopy can be performed again. At this time, you need to turn over only 3-4 times a day.
- On the 20th incubation day, the eggs will need to be sprayed 3 times a day with a mild potassium permanganate solution. Tip: a day before the chicks hatch, you will have to process the materials with potassium permanganate (1% solution) only 4 times.
Starting from day 28, you will need to spray goose eggs with warm water every 4 hours. It is recommended to cover the materials with gauze napkins, which will only remain moistened constantly (approximately every 2 hours). You can also stop turning and cooling eggs.
At the last stage of development, the temperature should be at the border of 37-37.4 ° C, and the humidity level should vary between 70 and 75%. There is no need to close the ventilation of the apparatus.
Incubation lasts approximately 29-30 days. After this, a two-day mass process of hatching of goslings begins (the egg stirred and cracked along the shell). This incubation period is the most important incubation stage for the offspring.
If the chicks after the end of the incubation period of the goose did not all start hatching, then ovoscopy the eggs should be carried out in a day and pierce the shell in the place of the beak with a sharp object so that the chicken has access to the air (in other words, “hatch” the chick). If you do not know how to perform this procedure correctly, be sure to watch the video material (it is not difficult to find it on the Internet).
After the goose is born, they must be left in the device until they dry completely, then transferred to a brooder and leave there, supporting life with water and special food.
The rate of output of healthy goslings should be about 80%.
Typical problems for beginners
If you decide to do goose incubation at home, it is unlikely that you will be able to avoid the problems with one experiment and keep the brood completely. , often make mistakes that can lead to the death of all offspring or very low rates of hatchability.
Usually, the death of offspring is due to neglect of the rules that must be strictly adhered to in order to get a brood (do not cool the mat The series, without the need, clearly recreate the incubation mode of goose eggs, taking into account home conditions).
Here are some possible reasons for the inability to hatch goslings in a home incubator:
- It is better to collect eggs when the laying hen refuses to hatch. If the brood hen has a desire to hatch the offspring on his own, then you should not injure her, just take and leave her at least one thing.
- Neglecting the correct laying of eggs and turning them over at any incubation period.
- Sudden changes in temperature in the incubator. This can entail either overheating of the eggs or their strong cooling. As a result, the death of offspring. If you doubt whether you can ensure an uninterrupted supply of electricity to maintain the desired temperature, then it is better to play it safe and purchase a generator.
- Uncooked attitude to humidity indicators, irregular level monitoring and lack of timely adjustment in the incubator. Humidity, as well as temperature, must be regulated on time and accurately (cooling of the material must not be allowed). If this rule is neglected, the goslings stop developing and, as a result, die.
- The desire to incubate the goslings without total control over the hatching process. In the absence of the necessary experience and knowledge, poultry farmers can open the incubator too often and watch the process. As a result, hypothermia can occur, and, as a result, goslings do not hatch.
- In such a difficult process as incubation of goslings, you should not save on resources.How many times have newcomers in this business tried to save money by turning off or completely turning off the light in the incubator. This cannot be done, as the result will be the fading of the embryos. To obtain the quality of cultivation, the lighting regime must be strictly observed.
- Beginners often seek to get offspring as early as possible, trying to help hatch without good reason, picking goslings out of the incubator with their hands, without waiting for the moment to completely dry. As a result, it turns out that wet goslings die from hypothermia. You need to wait until the goslings in the incubator are completely dry. Only daily goslings can be removed.
The entire incubation process consists in special attention from specialists or those who want to become them. Goslings can be hatched both in home appliances and in industrial devices. The latter win because they have great potential for creating a vital microclimate with hatching hatchability.
The key to a good healthy offspring is to create favorable conditions for the incubation of goose, or rather, keeping the eggs in conditions as close as possible to the external environment. Maintenance and care must be of a high standard.


